Protect Your Photos in Facebook

protect+facebook+pics
The only thing we can do to protect our images on Facebook is setting the album privacy to only our friends!. But what about the people who had so many people as their friends! Watermark is a simple way to stop others from using your images for bad things.
Check: Facebook Tips and Tricks
You might me be getting a doubt "Will this stop spammers and bad people from using images?"the answer to your doubt is It can't stop them the spammers and bad people from using your images but you can stop to some extent. Because most of the spammers want bulk amount of images downloaded which are not watermarked and then use them for their work,as they don't want to waste time on editing your images!. This way we can stop the spammers from using the images to some extent.

Here we are going to show you how to watermark your Facebook images with DMCA

What is DMCA?

DMCA is the short-form of Digital Millennium Copyright Act. DMCA helps the original copyrighted holder to protect their work from being  used by the other people.The work can include blog content, videos, pictures, websites, games.
DMCA also lets you to file a case in complete legal way against those who copied your work!

Here is How to use DMCA tool to watermark the images.

  • First register an account with DMCA from Here.
register
  • After completion of registration Facebook watermark tool from Here.
  • Now Authorize DMCA to get the images from your Facebook profile by clicking on "Get Facebook Albums'
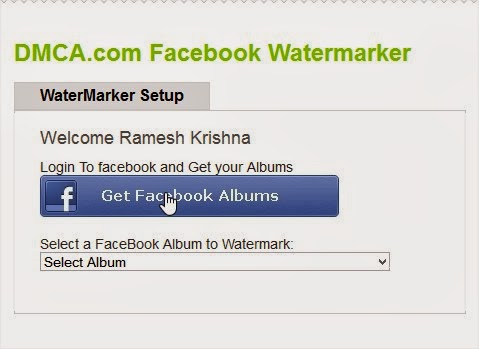
get+fb+albums
  • After grating the access to get the images, select the albums from dropbox menu.
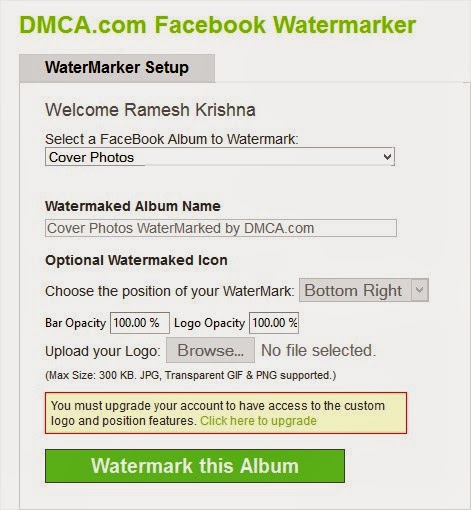
albums
  • Hit on Watermark this Album.and you are done. that's it all your images will be watermarked with DMCA logo.
  • In order to remove the DMCA logo and add your own logo you need to upgrade your plan to monthly to yearly.
spacer

बिना फोर्मेट करे विंडो XP 2 को विंडो XP 3 में बदलने का तरीका


बहुत से सोफ्टवेयर या गेम ऐसे होते है जो विंडो सर्विस पेक 2 में नहीं डलते सोफ्टवेयर या गेम को डालने के लिए विंडो एक्सपी 3 की जरूरत होती है और साथ ही साथ NET Framework  की भी जरूरत पड़ती है ये परेशानी अक्सर उन लोगो के साथ आती है जिन्होंने अपने सिस्टम पर विंडो एक्सपी सर्विस पेक 2 डाली हुई है ये पोस्ट पढने के बाद उनको इस परेशानी से छुटकारा मिल जायेगा


सबसे पहले आपको वो ट्रिक बताने जा रहा हु जिसे करने के बाद आप अपनी विंडो एक्सपी सर्विस पेक 2 को सर्विस पेक 3 में बदल सकते हो वो भी विंडो को बिना फोर्मेट करे

अगर आप अपनी विंडो सर्विस पेक 2 को 3 में बदलना चाहते हो तो सबसे पहले आपको स्टार्ट बटन पर क्लीक करने के बाद रन पर क्लीक करना है
उसके बाद आपको regedit टाईप करके ओके बटन पर क्लीक करना है  इसके बाद आपको निचे बताये गयी सेटिंग के अनुसार क्लीक करना है
"HKEY_LOCAL_MACHINE\SYSTEM\ CurrentControlSet\ Control\ Windows" पर क्लीक करने के बाद आपको बराबर के बॉक्स में  "CSDVersion" लिखा दिखाई देगा उसे डबल क्लीक करे और उसकी वेल्यु  "200" से बढ़ाकर "300" कर दे और अपने सिस्टम को रिस्टार्ट करे अब आपकी विंडो सर्विस पेक 3 में बदल चुकी है इसकी जानकारी के लिए माई कंप्यूटर पर राईट क्लीक करके प्रोपर्टी पर क्लीक करे वहा आपको विंडो एक्सपी 3 का मेसेज दिखाई देगा !!!


ये तो थी वो छोटी सी ट्रिक जिसे करने के बाद आपकी विंडो एक्सपी बिना फोर्मेट करे ही सर्विस पेक 3 में बदल जाएगी अब बात करते है दुसरे मेसेज की NET Framework का मेसेज विंडो में बहुत आता है क्युकी बहुत से सोफ्टवेयर इसके बिना नहीं चलते अगर आपके सामने भी NET Framework की परेशानी आती है तो आप यहाँ क्लीक करके डाउनलोड कर सकते है

spacer

Remotely access another computer using Google Chrome


Remotely access another computer using Chrome

What to do if you want to show something to others in their own PC from a remote place ? Sometimes it is easier to control their PC remotely instead of giving the instructions on the phone.There’s already a program that does this (comes with Windows), it is called Remote Desktop, but how many people know how to setup the router/ports/firewall necessary for it to work? To do all Introducing TeamViewer, the simplest software ever built for this purpose. (Free for personal/non-commercial use).Now you can also Remote Access another computer using Chrome browser without any subscription or any paid software.Chrome has launched a app for its browser named Chrome Remote Desktop BETA which allows you to remotely control your friend’s system using chrome, googleapp or gmail id. Chrome Remote Desktop BETA is fully cross-platform, so you canconnect any two computers that have a Chrome browser, including Windows, Linux, Mac and Chromebooks.You can Download Chrome Remote Desktop extension from the Google Chrome Web Store. The addon will be automatically installed. If you leave theinstallation page open, you can launch the app right from that page.HOW TO WORK WITHTHIS APPLICATION
1.After installation go to the start page you can see the the application as shown below in your start page.
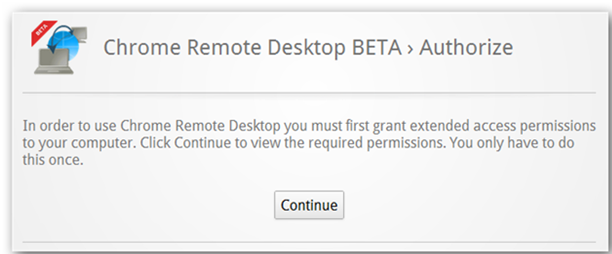
2. Click on the Chrome Remote app to open it and to see the window shown below.
3
. Click continue and you will asked to allow access to your data. proceed with allowing access.\
4
. Then it will ask you whether you want to share your own computer to some other system or connect to a shared computer.
5
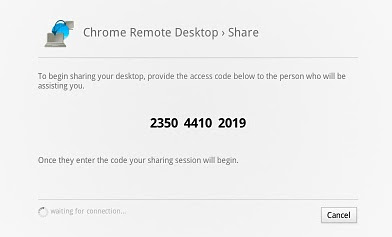
. If you clicked share this computer, then it will generate automatic sharing code.
6. Just send this code to your partner to connect to your system as shown below.
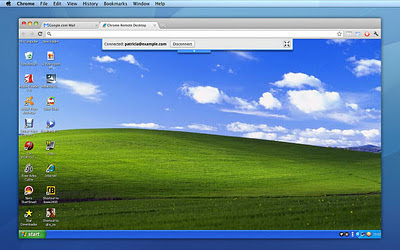
7. Once connected you will see their desktop as seen below and can do whatever you like.
 
Thats it now you are connected to remote computer.


spacer